Everything you ever wanted to know about thermocouples & RTD!

How to differentiate a thermocouple from an RTD, how to know if your thermocouple is working well, what are the main reasons for premature breakage? Tips and more!
How to determine the type of thermocouple?
You never changed the thermocouple of this machine? The origin of the machine (German, Italian, American), normally determines the type of thermocouple you have in front of you but to be sure, here is a color code of wires (depending on the country) to help you determine what type of thermocouple you are dealing with:
How to differentiate a thermocouple from an RTD?
A thermocouple, regardless of its type (J, K, T, etc.), will give you a tiny Ohms measurement (e.g. 0.07 Ohms), in other words, close to nothing! The longer the wires, the more it will change the reading of the Ohms but again, we are talking about a tiny measurement. The resistor you measure is that of the wires.
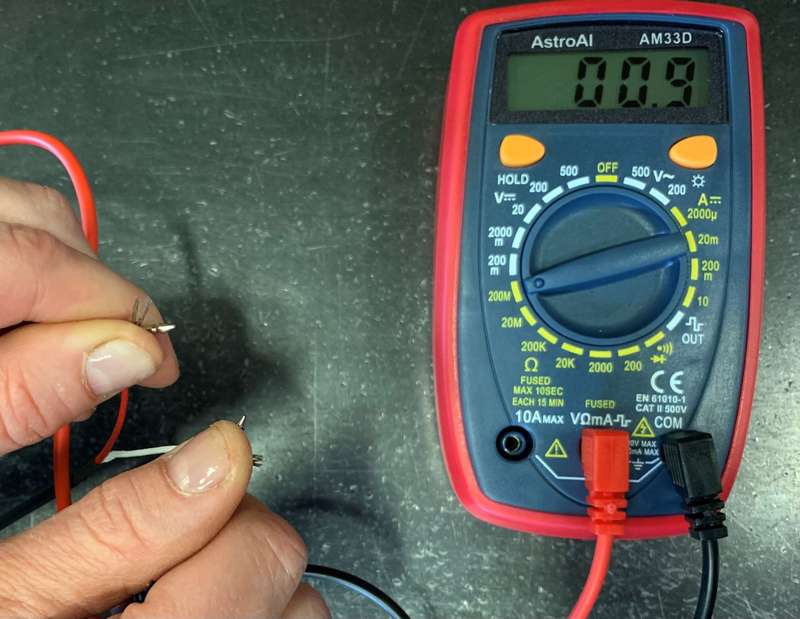
For RTD’s, you will get a resistor around 109-110 Ohms. An RTD PT-100 says it: 100 Ohms. However, ambient temperature will record more ohms since an RTD is more sensitive to room temperature.
Same thing for an RTD PT-1000. It will read a little more than 1000 Ohms. If you measure more than 10 000 Ohms, you are dealing with a Thermistor.
A good way to differentiate a thermocouple from an RTD is that the 2 internal wires in the thermocouple insulation are of different colors. Ex: On a type J thermocouple, one wire has a coppery color (iron) while the other is more metallic (constantan). The metal wires inside an RTD are always the same color.
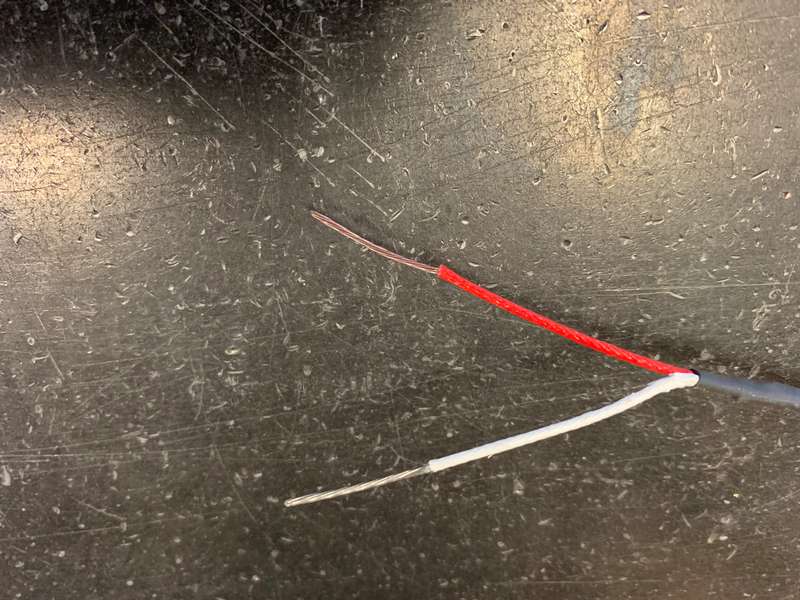
Thermocouples wires type J
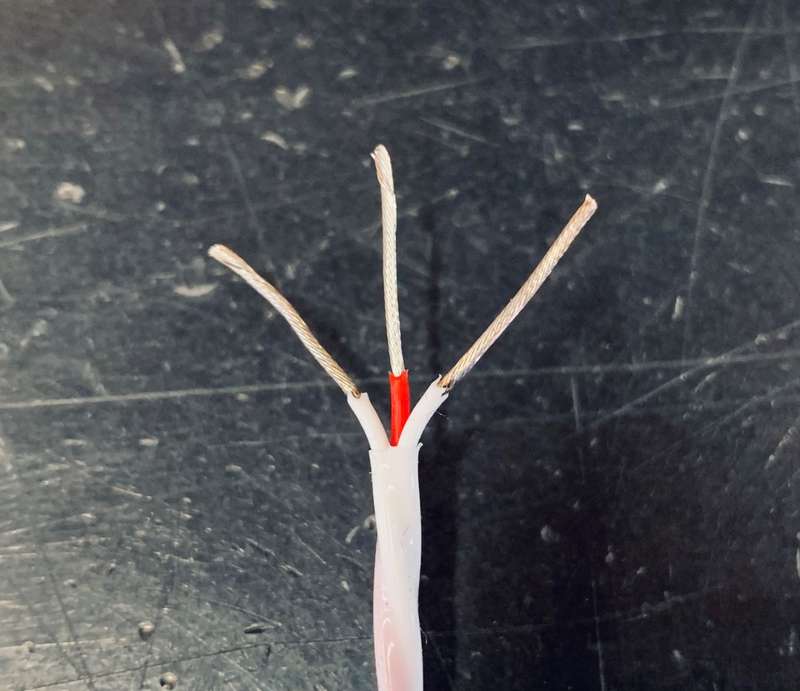
RTD wires
Also, don’t get mistaken, you can have 1 white “wire” + 1 red “wire” and think you are dealing with a type J thermocouple: ERROR. This is an RTD. So, it’s better to measure the ohmic resistance before asking us for a quote, especially if you’ve never changed that probe!
P.S.: An RTD can have 2, 3, 4 or 6 wires. Please always let us know how many wires your RTD is made of.
Choice of wires and sheath
This is a very important choice because it is possible that the insulation over your wires does not withstand the operating temperature of your application. These can melt and create a short circuit by touching each other.
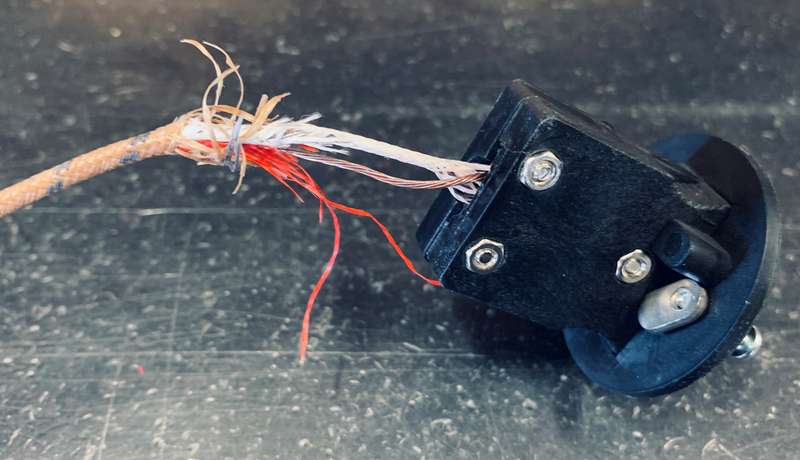
Here, the crumbling of the wires due to repetitive movement could have caused a short circuit.
Refer to the following link in order to correctly choose your wires according to your operating temperature:
Advice for the food sector: |
| The ambient environment is often humid since machines are disinfected at the end of the day. We therefore advise |
| you to choose Teflon wires with epoxy sealing to prevent moisture from entering the tube, and thus alter the |
| measurement of your temperature. Epoxy sealing is valid for all wetter than standard environments. |
Is the alloy of the tube important?
It is related to the operating temperature it can reach. Volton uses 316 stainless steel tubes. It is the most common alloy in the food industry. It can rise up to 870°C in the air and is resistant to many chemicals. So, yes, the alloy is important.
Another common alloy is Inconel 600, which rises to 1095°C.
What temperature range can thermocouples and RTD’s withstand?
Thermocouples:
- Type J : -40 °C to 750 °C
- Type K : -200 °C to 1350 °C
- Type T : -200 to 350 °C
RTD:
- PT 100 and PT 1000 : -70°C to 500°C
The temperature range of a probe also depends on its construction: regular probe, MgO (up to 1150°C) or tubeless (2 welded wires). If there is epoxy in the probe, the maximum is 260°C.
Don’t forget that a regular construction probe has electrical insulation in the probe, provided by the wire sheaths, which can limit the maximum temperature of the sensor. If your operating temperature is more than 260°C, wire options are substantially reduced. In this case, we go with an MgO probe.
A trick to know if your thermocouple or RTD is working well!
Heat the probe! We test them by plugging the wires into a controller and heat the probe, using a mini industrial dryer.
1st step: Plug in the thermocouple/RTD. It normally gives you the ambient temperature reading, e.g. 75°F for our factory. If the result is slightly higher or lower than the ambient measurement of your factory, no need to heat it. It is time to replace it!
2nd step: Heat it up. If at start up, it takes too many seconds before the thermocouple or RTD rises in temperature, your probe has reached its end of life. One possible cause is that the weld has weakened over time.
To check a thermocouple, compare its reading to the temperature of what it measures.
Tip if there is movement in your application:
If the thermocouple moves with the mold, for example, make a loop in the wire, as below, to prevent crumbling of the wires at the end of the tube’s junction. It thus reduces the pressure in this area.
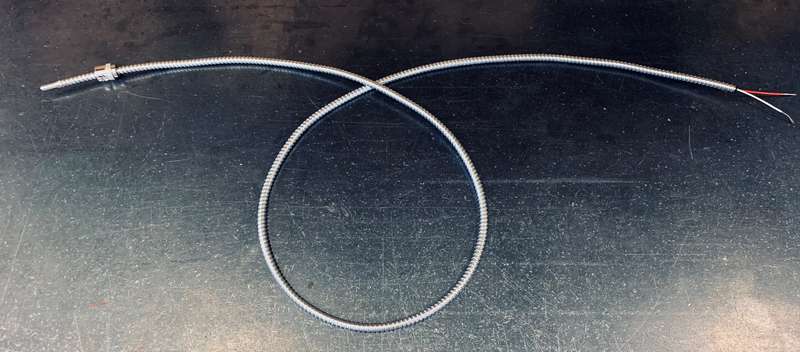
The longer the wire, the worst it is?
True! For an RTD especially, the wire should be as short as possible because there is a great risk of electromagnetic interference. A good idea may be to compensate the length of the wires, which must remain short, by installing more wires on your RTD (go from 2 to 4 wires for example).
For a thermocouple, the wires can have a few feet. However, if the wire gets crushed by a repetitive motion of the machine or gets trampled by employees this can damage the insulation, e.g. Type J Fiberglass. Without proper insulation, the wires will come into contact and create a short circuit.
What is the difference between a Grounded and an Ungrounded probe?
A thermocouple is Grounded by default. This allows the sensor to react faster to a change in temperature.
When is it best to use an Ungrounded probe?
An Ungrounded probe means that the junction of the thermocouple is isolated from the metal tube of the probe, as below.
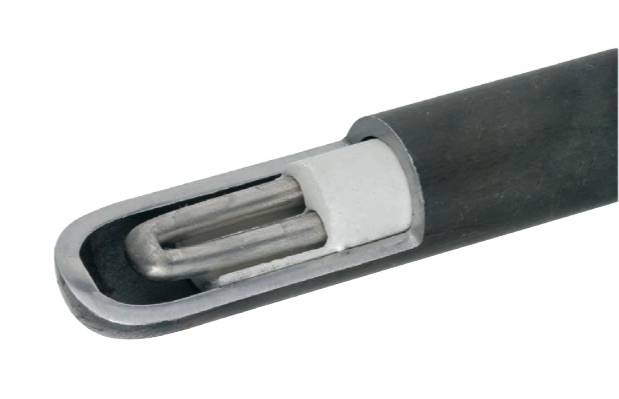
This is the right solution when the temperature reading device (controller, capture card, PLC, etc.) is sensitive to a ground loop. If the thermocouple circuit is already grounded by the reading device, the probe and the device do not necessarily have grounding at the same voltage.
Also, in applications where there is a lot of vibration, an Ungrounded thermocouple can prevent misreading in the longer term.
An RTD is always Ungrounded.
Here are the standard thermocouple models that we custom manufacture:
See our custom Thermocouple models
Be aware, however, in the event your model is not listed on that page, that we still probably can manufacture it!
What are the most well-known reasons for early breakage of a thermocouple & RTD?
- The age and temperature cycles sustained by the probe, weakening both the probe and the thermocouple junction
- A wire broken by repetitive movements
- Mechanical breakdown
- Improper handling or use of the thermocouple
- Overheating
- Oxidation of the probe or wires
- Contamination of the probe
- A poorly made weld
- Wires not adapted to the surrounding temperature
- Lots of vibration in the application
High temperature thermocouple or acidic solutions!
Volton manufactures custom thermocouples for high temperature applications. A customer called us one day and he had exactly this type of thermocouple whose tip was immersed in a molten tin basin.
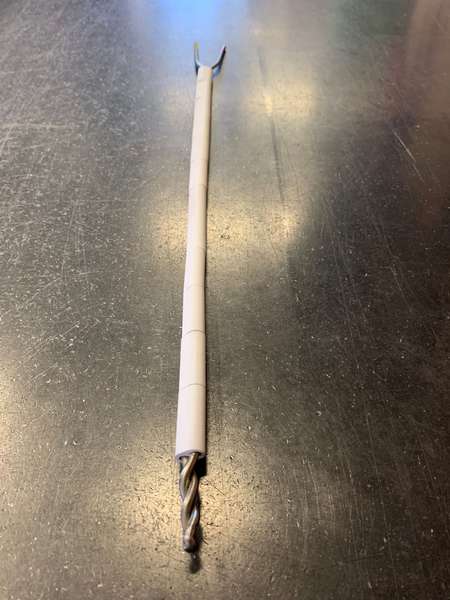
A type Kthermocouple with this wire alloy can withstand a temperature of 1250°C in the air. In a molten tin bath, it was necessary for the thermocouple to be inserted into a metal or ceramic well, otherwise the wire would melt.
We had another case of a customer whose thermocouple probe was immersed directly in 15% sulfuric acid concentration. The liquid, however, was not heated to high temperature, but as the acid eats away at stainless steel, the solution was to add a thermo-retractable Teflon/PFA sheath with a layer of FEP inside to ensure better adhesion to the probe.
In short, contact us because the solution depends a lot on your application!
 Skip site navigation


